
TL;DR
Most noise reduction in a closet rig comes from strategic placement and sealing gaps, not just foam. Moving your equipment into another room or closet can eliminate most noise issues, while proper ventilation prevents overheating. Treating reflections and vibrations completes the setup for a quiet, efficient space.
Ever wondered why some closet setups seem so quiet, while others just echo like crazy? The answer isn’t just slapping foam panels everywhere. It’s about understanding what noise is — and where it’s actually coming from.
If your goal is a peaceful workspace or a professional-sounding recording nook, this guide will show you the real game-changers. You’ll learn how to use space, placement, and simple tricks to go from noisy to whisper-quiet—without breaking the bank.
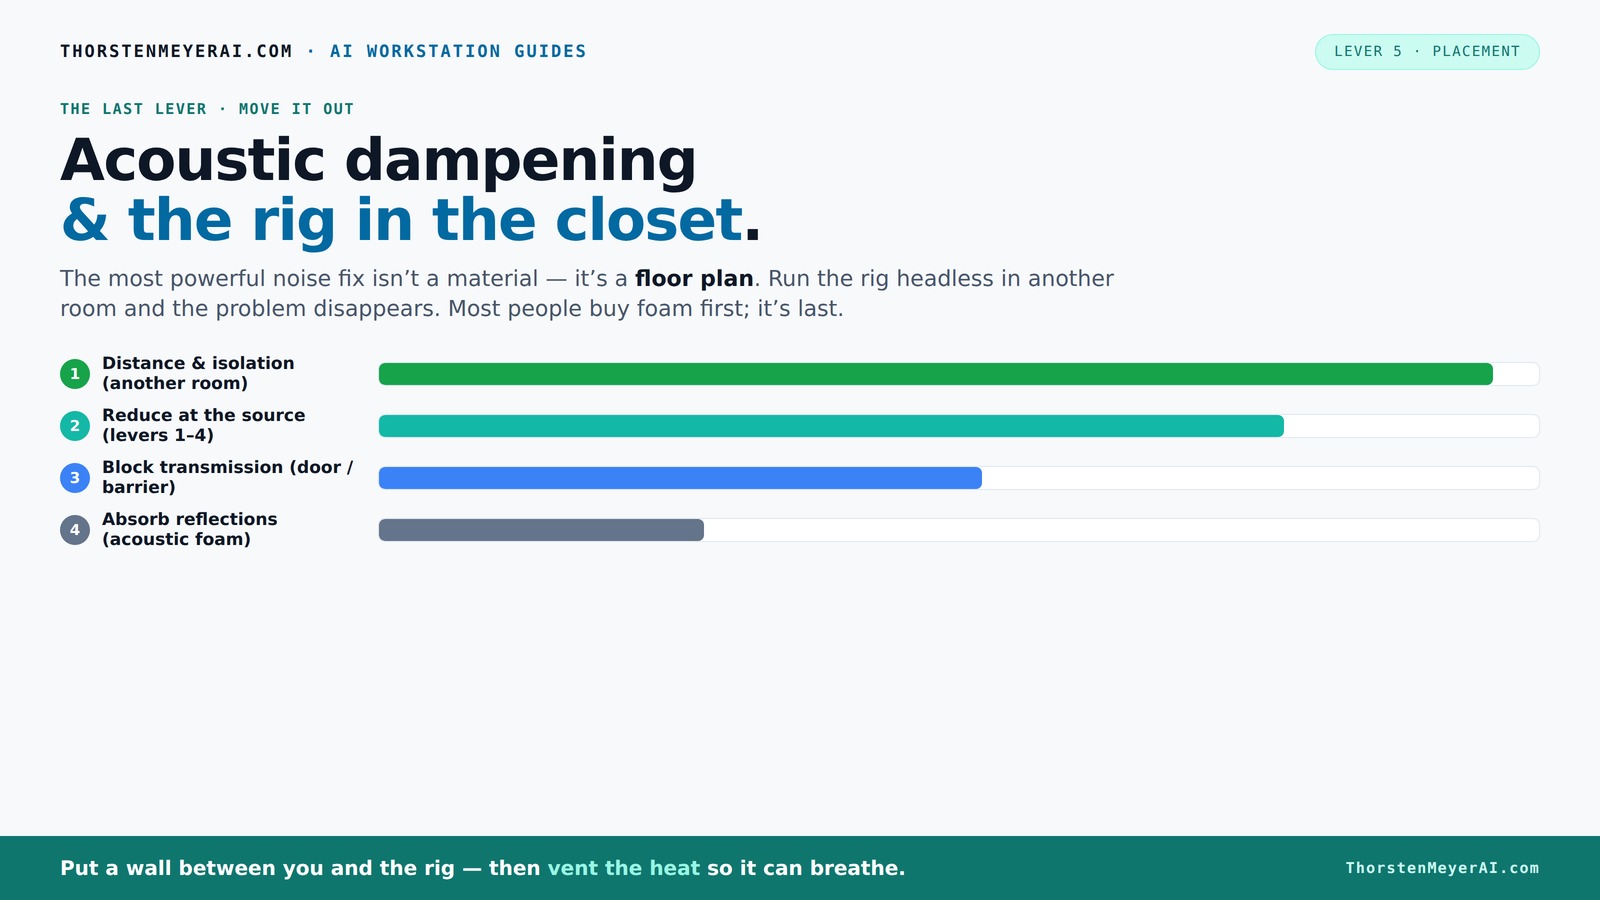
Acoustic dampening
& the rig in the closet.
The most powerful noise fix isn’t a material — it’s a floor plan. A rig you can’t hear because it’s in another room beats any amount of foam. Tap the approaches in Part 1 to see what actually works.
(another room)
(levers 1–4)
(door / barrier)
(acoustic foam)
Contain the noise, not the heat
Key Takeaways
- Sealing gaps around doors and panels is far more effective than foam for blocking noise leaks.
- Moving your rig into a separate room or closet often reduces noise by more than 90%, making other treatments optional.
- Proper ventilation is critical—use quiet exhaust fans or ducted cooling to prevent heat buildup and noise spikes.
- Position your microphone thoughtfully, aiming into treated areas and away from reflective surfaces for clearer sound.
- In small closets, bass traps and soft furnishings like blankets greatly improve sound quality, especially for vocals and voiceovers.

Focusound 52 Pack Acoustic Foam Panels 1" x 12" x 12" Sound Proof Foam Panles Soundproofing Noise Cancelling Wedge Panels for Home Office Recoding Studio with 300PCS Double-Side Adhesive
Soundproofing - Acoustic foam panels triangular grooves structure for better noise absorption, helps to reduce and absorb unwanted...
As an affiliate, we earn on qualifying purchases.
As an affiliate, we earn on qualifying purchases.
Why Most Noise Isn’t Fixed by Foam Alone
Acoustic foam and panels are primarily for reducing reflections, not blocking noise from escaping or entering. Think of foam as softening the echo inside a room, not building an acoustic fortress. If your goal is silence, foam alone won’t cut it.
For example, a typical closet with foam panels might sound less harsh, but your neighbor still hears every fan and hum. To truly block sound, you need barriers and sealing—think of it as building a soundproof castle, not just lining the walls with velvet.
This matters because many assume that adding foam will make their space silent. However, without addressing the structural gaps and barriers, outside noise will still leak in, and internal sound will still escape. The tradeoff is that foam can give a false sense of security—improving internal acoustics but not preventing external noise intrusion. Understanding this helps you prioritize sealing and barriers for effective soundproofing, which is often more critical than adding more foam.

Audimute Soundproofing Acoustic Door Seal Kit - Door Sweep and Seal - (Large Size)
Includes (2) Door Seals (3/16" x 1/2" x 50') and (1) Door Sweep (1/2" x 1.5" x 25').
As an affiliate, we earn on qualifying purchases.
As an affiliate, we earn on qualifying purchases.
How to Position Your Microphone & Gear for the Best Sound
- Place the microphone away from reflective surfaces like walls or the closet door.
- Point the mic into the treated space, aiming at the source (your voice or instrument).
- Use a reflection filter or a portable panel behind the mic to catch echoes.
- Keep the performer close to the mic to minimize room sound.
For example, if you’re recording vocals in a closet, position the mic about 6 inches from your mouth, facing into the room, with a foam panel or blanket behind it. This setup captures your voice clearly while muffling the room’s reflections.
This arrangement matters because mic placement directly impacts the clarity and quality of your recordings. Being close to the microphone reduces the room's influence, but the orientation and surrounding treatment help prevent echoes and unwanted reflections. The tradeoff here is balancing proximity—too close can cause distortion—and distance, which can introduce more room noise. Proper placement ensures that your recordings sound professional without needing extensive post-processing.

Soundproof Sleeping Pod, Noise Cancelling Bed Tent with 40mm Soundproofing Cotton, Portable Blackout Canopy for Privacy, Foldable Sleep Enclosure for Dorm Room or Home Office
Soundproof Sleep Capsule: This innovative audio sleep capsule features dual 3070 cavity speakers delivering clear sound. With a...
As an affiliate, we earn on qualifying purchases.
As an affiliate, we earn on qualifying purchases.
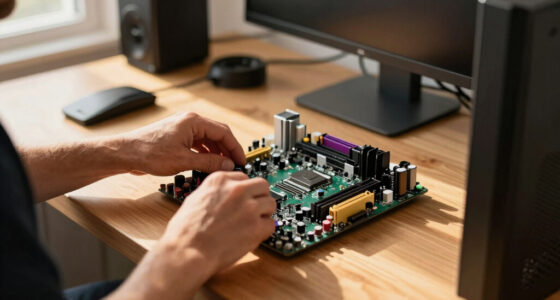
The “Rig in the Closet” Setup — How to Keep It Cool and Quiet
Putting a noisy, heat-generating computer in a closet sounds like a bad idea — and it is, without proper ventilation. A sealed space traps heat, causing the machine to throttle and roar. But with some tricks, you can keep your rig cool and quiet. Learn more about liquid cooling systems to improve heat management.
Use active ventilation—install a quiet exhaust fan or create a venting system that allows hot air to escape and cooler air to flow in. For example, a small, ducted fan can keep your GPU from overheating while still dampening noise.
This is important because overheating not only risks damaging your equipment but also causes fans to run at higher speeds, increasing noise levels. The tradeoff involves balancing airflow with noise reduction—adding vents or fans can introduce noise if not chosen carefully. For more on effective ventilation and acoustic treatment, consider these strategies to keep your setup both cool and quiet.

Sound Addicted - Studio Monitor Isolation Pads for 5 Inch Monitors, Pair of Two High Density Acoustic Foam which Fits Most Speaker Stands | SMPad 5
SMPad 5 is made out of the highest quality acoustical foam (50kg/m^3 density).
As an affiliate, we earn on qualifying purchases.
As an affiliate, we earn on qualifying purchases.
Sealing Gaps & Using Barriers to Block Sound Leaks
Your closet door, cracks around panels, and vents are the biggest points where sound leaks out or in. Sealing these gaps with weatherstripping or acoustic sealant can cut noise transmission by 80% or more.
For instance, sealing the door gap with weatherstripping turns a noisy closet into a nearly soundproof space. Adding a thickness layer of mass—like an extra drywall sheet or a soundproof blanket—further blocks sound.
This strategy matters because gaps and leaks are often overlooked but are responsible for most of the sound that escapes or enters a space. If you neglect sealing, even the best foam panels will be ineffective. The tradeoff is that sealing can be time-consuming and might require some effort to achieve an airtight fit, but the results are well worth it. Proper barriers prevent sound from leaking, making your other treatments more effective and your space significantly quieter.
The Power of Placement & When to Move Your Rig Elsewhere
The most effective noise reduction? Distance. Moving your rig into another room, basement, or closet means noise no longer reaches you. This is often more impactful than any foam or barrier.
If your setup is networked—via Ethernet or Wi-Fi—you can control your machine from a laptop or remote device. The rig can roar in a closet, while your workspace stays silent.
For example, many creators run high-power AI rigs in a basement or spare room, accessing it over the network. This simple step solves 90% of the noise problem.
Understanding this is crucial because physical separation reduces the direct transmission of sound waves, which diminishes noise levels at your workspace. The tradeoff involves convenience versus noise reduction—relocating equipment might mean more setup effort but can save significant time and frustration. It also allows for better thermal management, since you can optimize cooling in a dedicated space. This approach often provides the most straightforward and effective solution for a quiet environment.
Ventilation & Heat Management in a Closet Rig
Trapped heat is the enemy of a quiet, safe rig. Without airflow, temperatures soar, fans spin faster, and noise skyrockets. To keep it cool, install a quiet exhaust fan or use ducted cooling systems.
Active airflow systems, like liquid cooling, help move heat out efficiently. Combining proper ventilation with soundproofing techniques can significantly reduce noise levels.g this with a thermostat-controlled vent keeps your rig cool without noise spikes.
This is important because heat buildup can cause thermal throttling, which not only reduces performance but also triggers louder fan noise as the system tries to cool itself. Proper ventilation prevents these issues by allowing continuous airflow, which stabilizes temperatures and minimizes fan speed fluctuations. The tradeoff is that adding vents or fans introduces potential noise sources, but choosing quiet, high-quality ventilation equipment minimizes this. In a small space, even simple solutions like an exhaust fan combined with open vents can effectively manage heat without sacrificing silence.
Low-Frequency Control & Bass Traps in Small Spaces
In tiny closets, low-frequency sound waves can create boomy, muddled recordings. Bass traps or thicker panels placed in corners help tame these standing waves.
For example, installing 4-inch thick bass traps in the closet corners can significantly reduce low-end buildup, making your recordings clearer and more balanced.
Over-treatment can deaden your space, making it sound unnatural or overly dull. It’s important to match the amount of bass trapping to your room size and the specific acoustic issues you face. Proper placement—especially in corners where low frequencies tend to accumulate—maximizes effectiveness. The tradeoff involves balancing absorption with maintaining some liveliness in your space; too much trapping can reduce natural sound, so evaluate your needs carefully.
Soft Surfaces & Clutter for Better Reflection Control
Clothes, blankets, rugs, and even hanging jackets are inexpensive, effective ways to absorb sound and reduce slap echoes.
In a tiny closet, hanging a thick blanket or draping clothes around the mic can cut reflections drastically. For instance, a thick comforter behind the mic and a soft rug on the floor create a cozy, less echoey environment.
This DIY approach matters because soft surfaces absorb high-frequency reflections effectively, preventing them from bouncing around and muddying your recordings. The tradeoff is that excessive soft clutter can make the space feel cluttered or cramped, so it’s about finding a balance between practical absorption and maintaining accessibility and comfort. Using everyday soft items is a quick, cost-effective way to improve sound quality without investing in expensive acoustic panels.
Frequently Asked Questions
Does acoustic foam really soundproof a closet?
Acoustic foam mainly reduces echo and reflections inside the space. It does little to block outside noise because foam doesn’t form a tight seal. For true soundproofing, sealing gaps and barriers are much more effective.Where should I place panels in a closet vocal booth?
Place panels at reflection points around the mic—behind, above, and beside you. Focus on the area directly in front of the mic and the back wall to minimize echoes and ensure clear recordings.Do I need bass traps in a small closet?
Yes, if you notice boomy low-end or muddled sound. Corner bass traps or thicker panels help tame these standing waves, especially in rooms under 4x4 feet.How thick should acoustic panels be for a closet?
Most small closet panels are 2 inches thick, enough to control mid and high frequencies. For low-frequency issues, thicker panels or bass traps—4 inches or more—are recommended.Should I treat walls, door, ceiling, or floor first?
Start with sealing gaps around the door and wall reflections. Then, focus on treating the reflection points near the mic. Floor and ceiling treatments are less critical unless echo persists.Conclusion
Quieting a closet rig isn’t about stuffing it with foam — it’s about smart placement, sealing gaps, and managing heat. When you treat the space as a system, not just a box, you get a workspace that’s both silent and safe.
Remember, sometimes the best solution is simply moving your machine out of sight and earshot. A tiny closet can become a surprisingly good studio — with the right tricks, it’s more about space management than soundproofing alone.